How to install Presets in Lightroom Classic

In this guide, we'll explain how to install presets in Lightroom Classic. Just like in Lightroom CC, the native preset format in Lightroom Classic is XMP. Below are the steps you need to follow to install presets in Lightroom Classic.

Guide to import Presets in Lightroom Classic

An easy-to-follow guide for adding presets (XMP) in the Adobe Lightroom Classic desktop.
Total Time Needed: 3 minutes
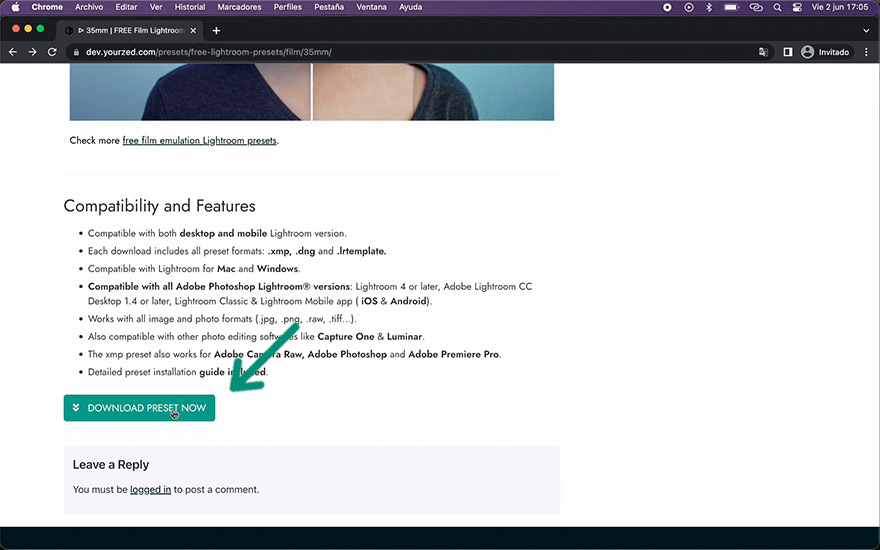
1. Download the presets
The first thing you need to do is to download the presets you want to install on your computer. You can buy them from an online store, download them from a trusted source on the internet, or create your own presets. Make sure the presets are compatible with Adobe Lightroom Classic. The latest versions of Adobe Lightroom Classic support preset formats in .xmp and .dng. In version 7.3 or earlier of Adobe Lightroom Classic, presets in .lrtemplate format can also be loaded, but this format is now deprecated.
2. Extract the files
The presets are likely compressed in a .zip or .rar file. If that's the case, you'll need to extract the files before you can install them.
3. Open Lightroom Classic:
Open the Lightroom Classic application on your computer. Once the application is open, you'll see the main screen.
4. Access Develop
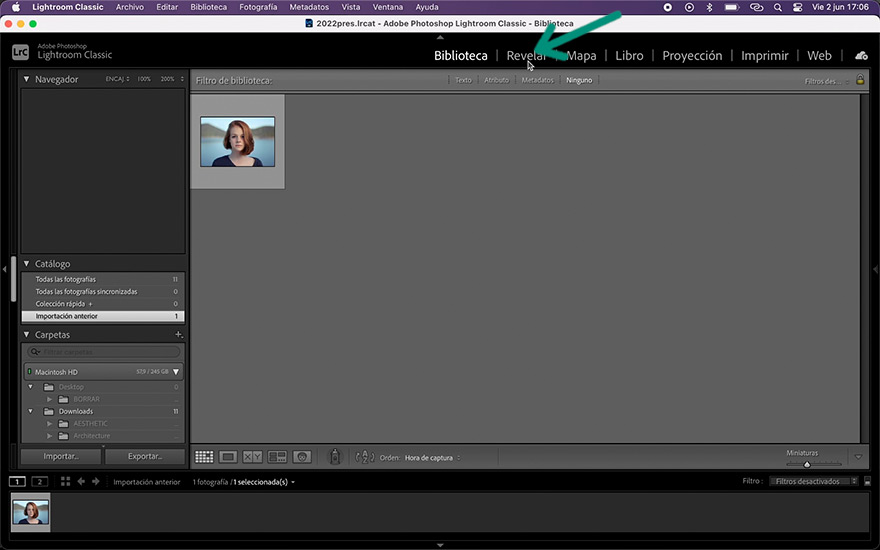
In Adobe Lightroom Classic, the photo editing module is called "Develop". Access this module to install the presets. Keep in mind that in order to access the Develop module, you must first have uploaded a photograph in the "Library" tab.
5. Import the presets
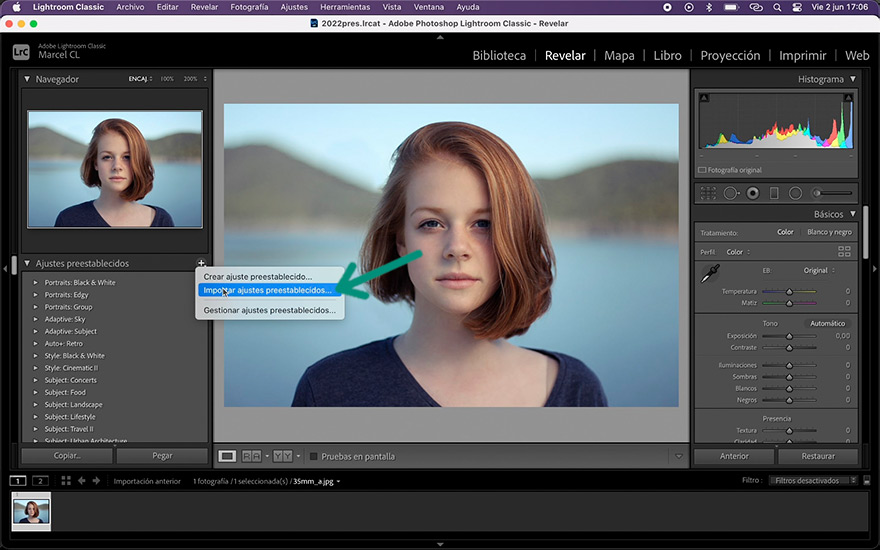
Look for the "Presets" tab in the left panel and click the "+" button and select "Import Presets" from the drop-down menu.
6. Select the preset files
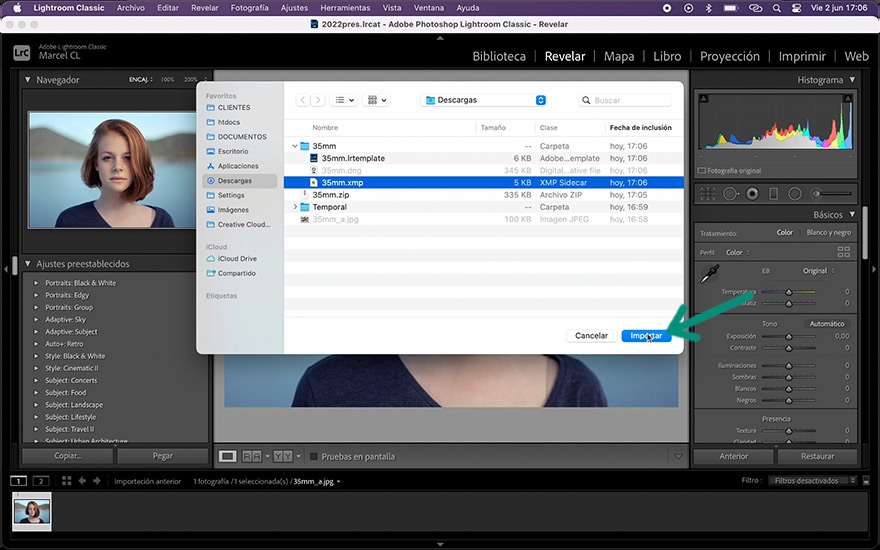
An explorer window will open. Look for and select the preset files you want to install in Adobe Lightroom Classic.
7. Verify the upload and try out the presets
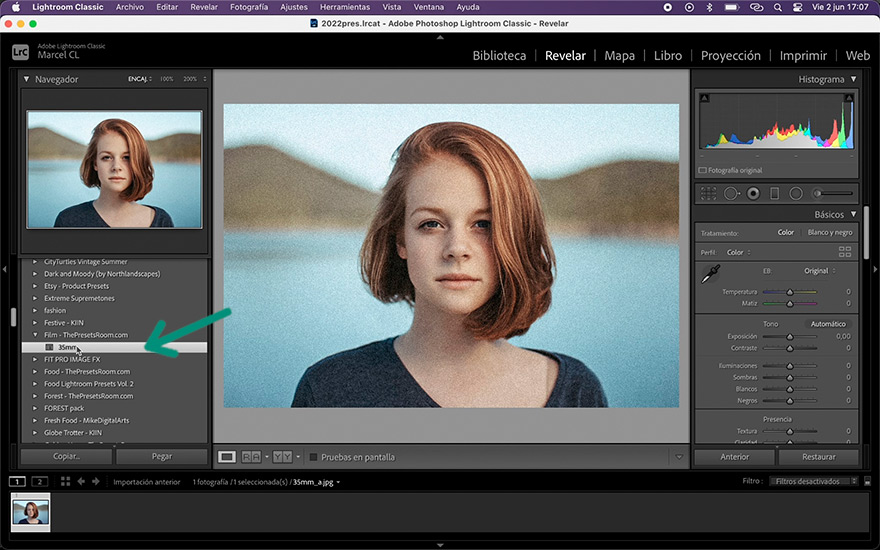
Once the installation is complete, you'll be able to find your new presets in the "Presets" panel within the "Develop" module.

Loading DNG presets in Adobe Lightroom Classic

Starting from version 7.3, Adobe Lightroom Classic also supports presets in .dng format. Follow these steps to load a DNG preset:

  1. Open the DNG file in the Library module.
  2. Access the “Develop” module.
  3. Within “Presets”, click on the “+” button.
  4. Select “Create Preset”.
  5. Save the preset with the desired name and within the desired group.

Frequently asked questions when installing presets in Lightroom Classic

Lightroom Classic is compatible with preset files in .xmp format. Additionally, you can also load presets using the .dng image format.
Yes, presets from Lightroom CC and Lightroom Mobile are compatible with Lightroom Classic as long as they are in compatible XMP format.

Imported presets will be stored in the “Presets” section of Lightroom Classic.

Yes, you can adjust an existing preset in Lightroom Classic and save the changes as a new preset.

No, you don’t need a Creative Cloud account. You can download the presets to your computer and import them directly into the Adobe Lightroom Classic application.

To delete a preset in Lightroom Classic, right-click on the preset you want to delete and select “Delete”. You can also select the preset and click the “Delete” button at the bottom of the presets menu.


  • Join our community and enjoy 20% OFF

    Get an extra 20% discount on any purchase by joining us. Plus, receive every new free preset and premium collection directly to your email. No spam, just top-notch content and offers to elevate your Adobe Lightroom edits.

    Explore our complete collections of presets for professional photo editing.